
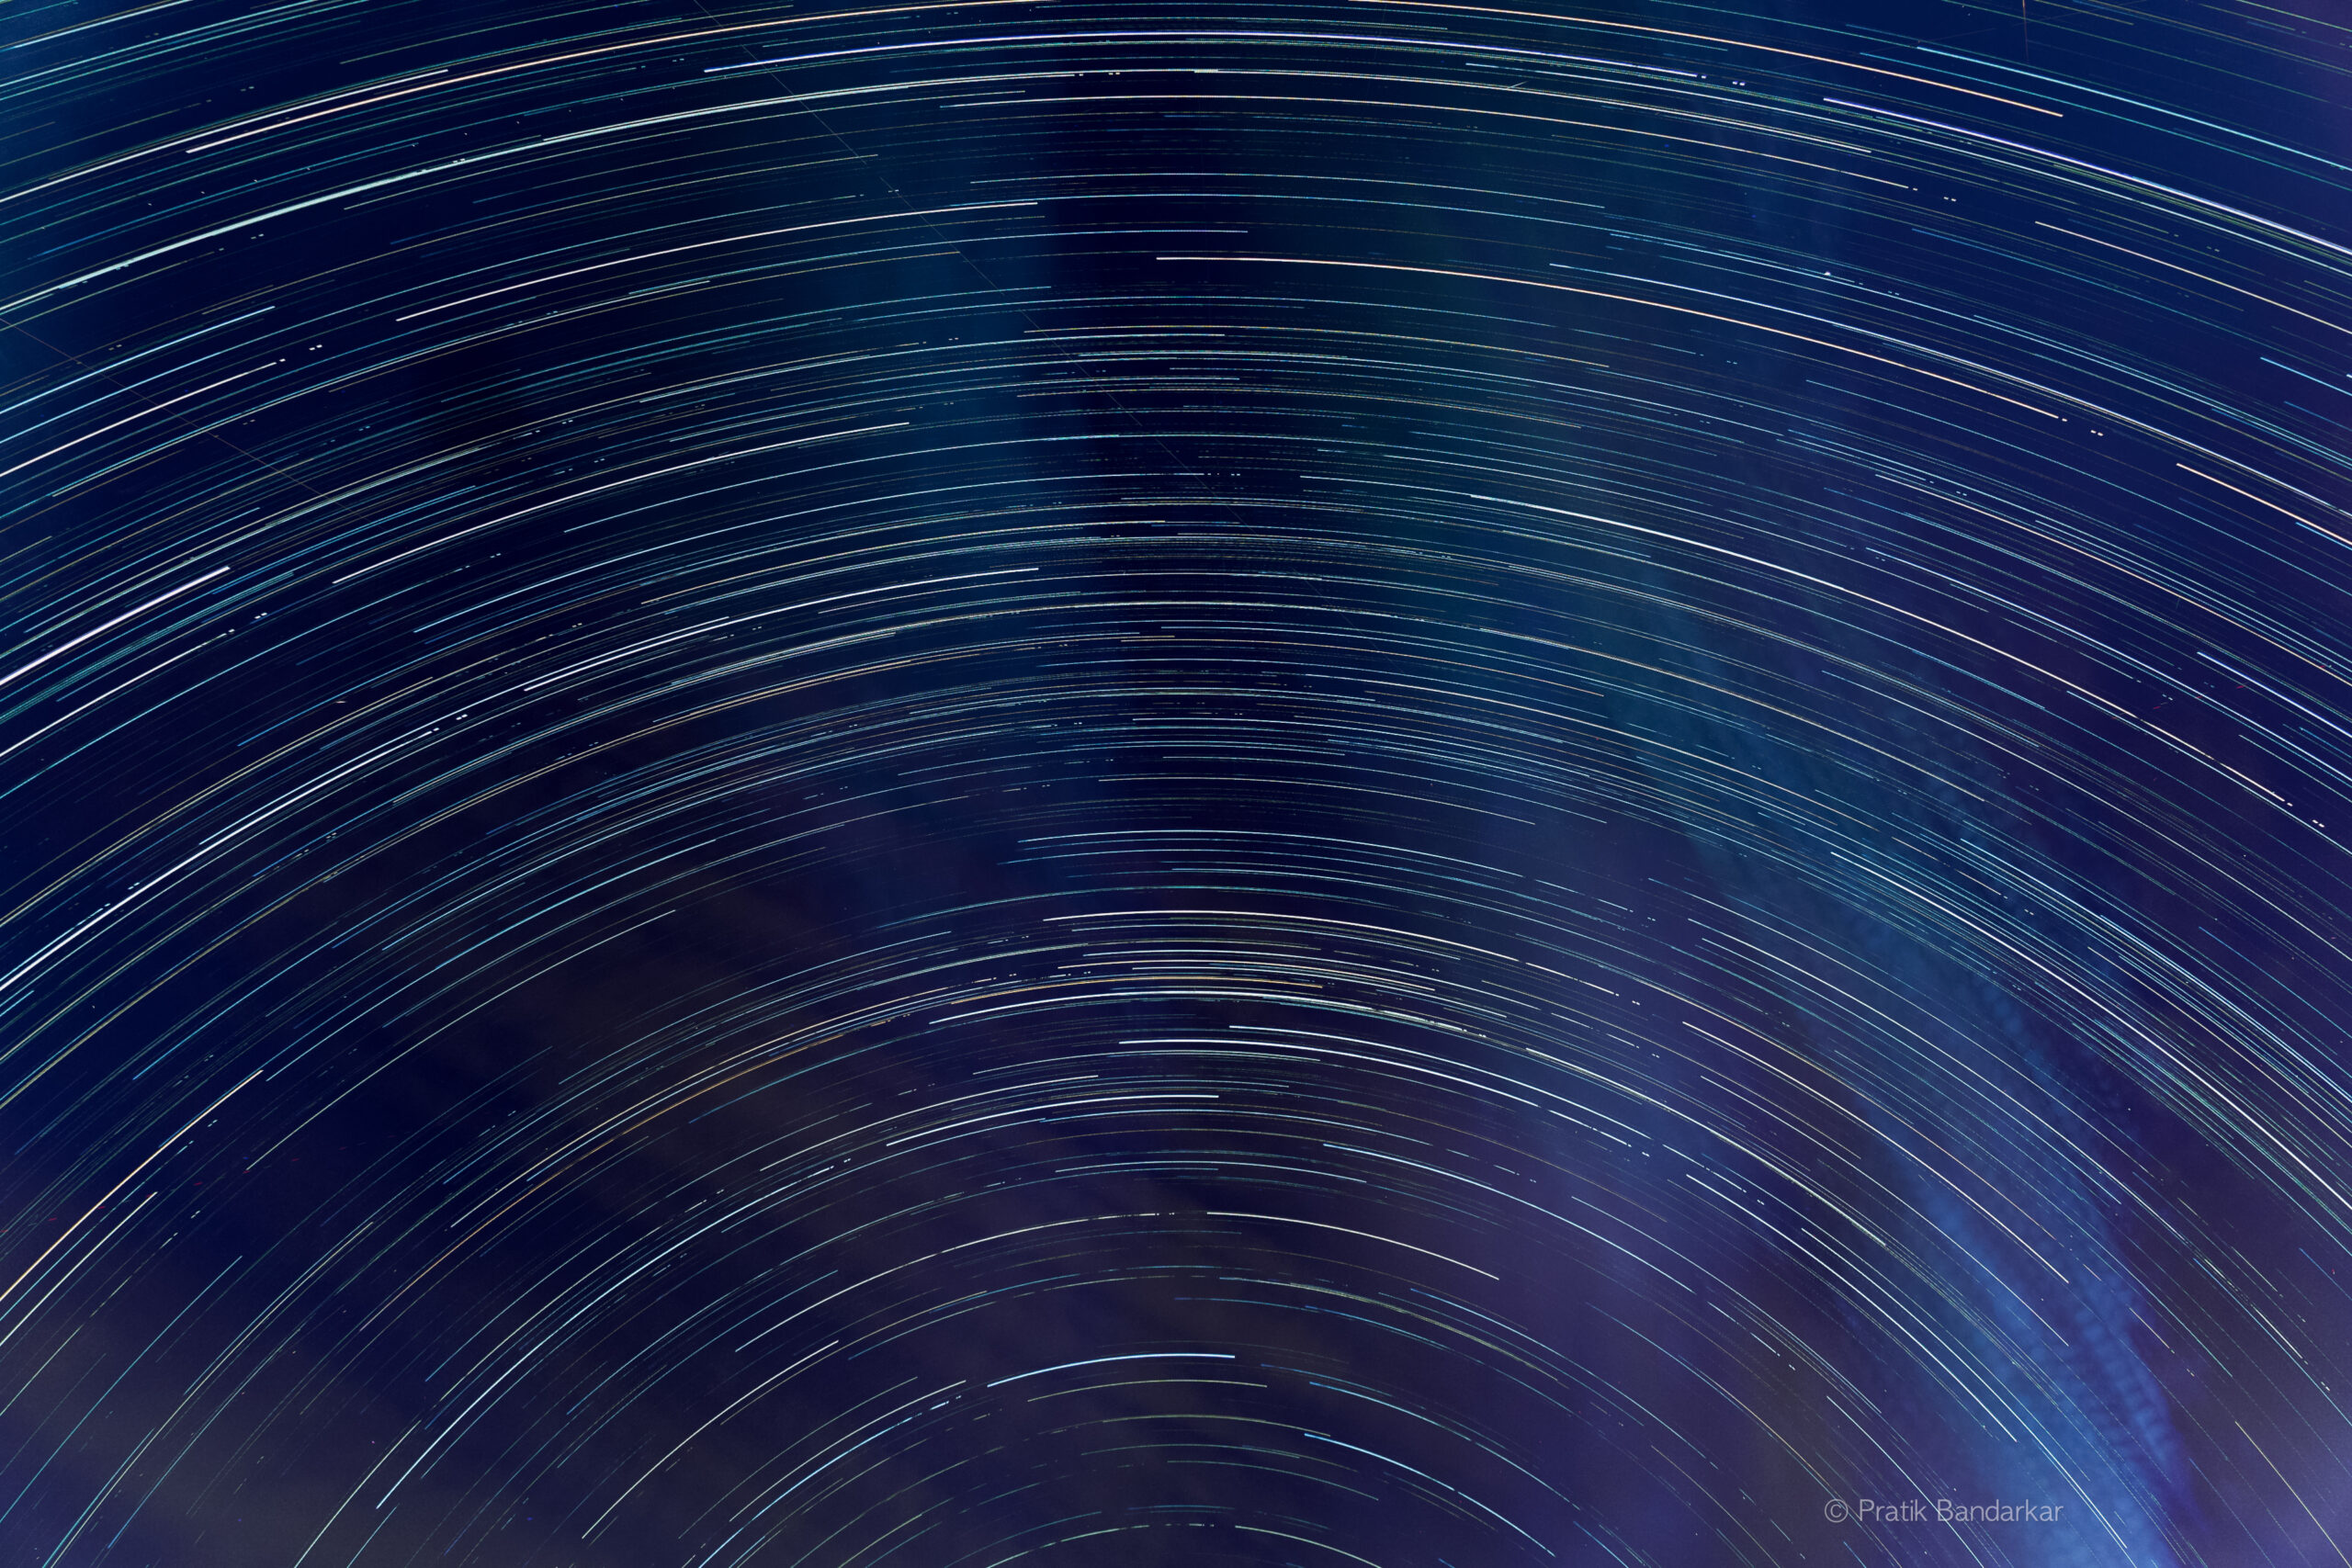
How I photographed the Perseid meteor shower from my backyard and turned the same sequence into a 4K timelapse and star-trail image.
Event: The 2026 Perseid meteor shower peak, overnight from 12 to 13 August. The best viewing window was from midnight until dawn, as reported in local Perseids viewing coverage.
I set out to photograph the Perseids from my garden. My main goal was to capture meteors, and I also planned to turn the sequence into a timelapse. I was shooting from an urban backyard, with surrounding light, occasional clouds, aircraft, and eventually dawn. After several hours, I had nearly 2,000 photographs.
The star trail was an unexpected bonus. While working through the meteor sequence, I realised the same frames had also recorded several hours of Earth’s rotation. I used those individual photographs to create a star-trail image.
The Setup
I used a Sony a6400 with a Sony 18-135mm lens, mounted securely on a tripod. Once interval shooting started, I did not move the camera, change focus, zoom, or alter the exposure.
- Camera: Sony a6400
- Lens and focal length: Sony 18-135mm at 18mm
- Mode: Manual Exposure
- Aperture: f/3.5
- Shutter speed: 6 seconds
- ISO: approximately 500
- File format: RAW + JPEG
- Focus: Manual Focus, near infinity and refined using a bright star
- SteadyShot: Off
- Long Exposure NR: Off
- Creative Style: Neutral, with Contrast, Saturation, and Sharpness at 0
- Interval: approximately 7 seconds between exposure starts
- Direction: roughly north-east, around 40 to 50 degrees on a compass
- Camera elevation: approximately 45 to 60 degrees above the horizon
Sony a6400 Setup Step by Step
Mount the Camera and Set the Lens
- Mount the Sony a6400 securely on a tripod.
- Set the Sony 18-135mm lens to 18mm.
- Make sure the tripod will not move during the sequence.
Keeping the framing identical across every photograph is important for both the timelapse and the final star-trail stack.
Set Manual Exposure
- Turn the top mode dial to M for Manual Exposure.
- Set the aperture to f/3.5.
- Set the shutter speed to 6 seconds.
- Set ISO to approximately 500.
I tested ISO 400, 500, 640, and 800. ISO 800 made the sky noticeably brighter because of the surrounding light pollution. ISO 400 gave a cleaner, darker background, while ISO 500 became the practical working setting for this sequence.
Set Image Quality and Focus
- Press MENU, go to Camera Settings1, select File Format, and choose RAW & JPEG.
- In Camera Settings1, select Focus Mode and choose MF – Manual Focus.
- Start with the focus ring near infinity.
- Find a bright star and use Focus Magnifier to magnify it as much as possible.
- Move the focus ring slowly around infinity until the star is the smallest and sharpest possible point.
The hard infinity stop is not always the sharpest infinity focus point. Once focus was correct, I did not touch the focus ring again.
Turn Off SteadyShot and Long Exposure Noise Reduction
- Set SteadyShot to Off because the camera was locked on a tripod.
- In Camera Settings1, set Long Exposure NR to Off.
- Set Creative Style to Neutral, with Contrast, Saturation, and Sharpness at 0.
Long Exposure Noise Reduction can create an additional dark-frame exposure after each photograph. With 6-second frames, that would create much larger gaps in the sequence and increase the chance of missing meteors.
Take a Test Frame and Compose
Before starting, I took a test image at 18mm, f/3.5, 6 seconds, and ISO 500. I checked that stars were small points, focus was sharp, and the sky was not washed out. If the sky was too bright, I reduced ISO. For this location, ISO 400 to 500 looked better than ISO 800.
My garden faced north, so I pointed the camera roughly north-east and raised it approximately 45 to 60 degrees above the horizon. For the Perseids, it was not necessary to point directly at the radiant because meteors can appear across a large part of the sky.
Configure Interval Shooting
- Press MENU, go to Camera Settings1, and select Interval Shoot Func.
- Set Interval Shooting to On.
- Set a suitable shooting start time so there is time to step away from the tripod.
- Set the shooting interval to approximately 7 seconds.
- Set the number of shots for the planned duration.
With a 6-second exposure and an approximately 7-second interval, the sequence was essentially 6 seconds exposing, a short gap, then the next exposure. Small gaps in the finished trails are therefore expected.
Once the sequence started, I left the camera alone. I avoided touching the tripod, changing focus or zoom, changing exposure, and shining lights towards the camera.
Why the Stars Form Trails
The stars only appear to rotate in the image. The effect is caused by Earth’s rotation while the camera remains fixed. Each frame records the stars in a slightly different position, and the stacking process accumulates those positions into arcs.
Lightroom Workflow
I edited one representative RAW frame, then synchronised the same settings across the full sequence. Consistent editing was important because changing exposure, colour, or contrast from frame to frame can create timelapse flicker.
- Edit one representative RAW frame.
- Sync the same settings across the full sequence.
- Keep source-frame processing conservative.
- Export sequential JPEGs for FFmpeg and stacking.
- Exclude dawn frames from the star-trail stack.
- Bring the final stacked image back into Lightroom for finishing.
Creating the 4K Timelapse with FFmpeg
I exported the edited sequence as sequential JPEGs, then used FFmpeg on macOS to make the 4K timelapse.
ffmpeg -framerate 25 -start_number 1 -i "_DSC%04d.jpg" \
-vf "scale=3840:-2:in_range=full:out_range=tv,crop=3840:2160,format=yuv420p" \
-c:v libx264 -preset slow -crf 18 \
-r 25 \
-color_range tv \
-colorspace bt709 -color_primaries bt709 -color_trc bt709 \
-movflags +faststart \
~/Desktop/perseids_timelapse_4k.mp4
At 25 fps, roughly 2,000 photographs create a timelapse of about 80 seconds.
I also created a short timelapse from the same sequence, showing the movement of the night sky and a few meteors captured during the session.
Creating the Star-Trail Stack with Python and Pillow
I used Python and Pillow to combine the exported JPEGs. For each pixel, the stack keeps the brighter value from the current image or the new frame. That lets successive star positions accumulate into trails while the dark sky mostly remains dark.
from PIL import Image, ImageChops
from pathlib import Path

folder = Path.home() / "Desktop/LR/timelapse"
files = sorted(folder.glob("_DSC*.jpg"))[:1400]

if not files:
    raise SystemExit("No JPEG files found")

print(f"Stacking {len(files)} images...")

stack = Image.open(files[0]).convert("RGB")

for i, file in enumerate(files[1:], start=2):
    img = Image.open(file).convert("RGB")
    stack = ImageChops.lighter(stack, img)

    if i % 25 == 0:
        print(f"{i}/{len(files)}")

output = Path.home() / "Desktop/startrail_full-1400.jpg"
stack.save(output, quality=95)

print(f"Done: {output}")glob("_DSC*.jpg")finds the exported JPEG sequence.[:1400]limits the stack to the first 1,400 frames.ImageChops.lighter()compares each new frame with the current stack and keeps the brighter pixel at each location.- The progress counter prints every 25 frames.
- The final stacked image is saved as a high-quality JPEG.
Choosing the Best Stack Length
I tested stacks of around 1,000, 1,200, 1,400, 1,815, and 1,969 frames. More frames produced longer and more dramatic trails, but the later frames also brought in brighter sky, haze, and dawn.
With a lighten stack, those brighter sky pixels accumulate too. More frames did not automatically mean a better result. Around 1,400 frames gave a cleaner balance. The 1,969-frame version created more dramatic trails, but required more Lightroom work to control the brighter blue and purple background.
Straight diagonal lines can be aircraft or satellites. They can be cleaned up later in Lightroom if needed.
Quick Reference for Next Time
- Camera settings: Sony a6400, Sony 18-135mm at 18mm, Manual Exposure, f/3.5, 6 seconds, ISO approximately 500, RAW + JPEG, SteadyShot Off, Long Exposure NR Off, and Creative Style Neutral.
- Focus: Manual Focus near infinity, refined on a bright star using Focus Magnifier.
- Interval: approximately 7 seconds between exposure starts.
- Lightroom: edit one RAW frame, synchronise the sequence, keep processing consistent, and export sequential JPEGs.
- FFmpeg: create the 4K timelapse from the JPEG sequence.
- Python: use Pillow and
ImageChops.lighter()to create the star-trail stack, then finish the composite in Lightroom.
What I Would Change Next Time
Find a Darker Location if Possible
The surrounding city light made the sky brighter and limited how far I could push the exposure and ISO. A darker location would give a darker background, better contrast between the stars and the sky, and more flexibility when editing. This was not a problem with the experiment, but it is the most obvious way to give a future shoot more room to work.
Compose Specifically Around Polaris and the North Celestial Pole
For this shoot, I framed a wide part of the north-east sky to improve the chance of catching Perseids. For a star-trail image planned as the main result, I would locate Polaris first and decide where I want the centre of the circular trails to sit in the frame. Polaris is close to the north celestial pole, so the stars appear to circle around that area.
Include a Stronger Foreground
This is a compositional choice rather than a correction. A foreground is a fixed subject in front of the sky, such as a tree, roofline, building, or landscape. It can give the trails a sense of place and scale. The sky-only version can still be beautiful, but a deliberate foreground would make a future image feel more grounded.
Minimise the Interval Gap Further if Possible
My 6-second exposure and approximately 7-second interval created a small gap between frames. That gap is why the trails have small breaks. Reducing it would make the trails look more continuous, but the current gaps are a normal result of the sequence and do not spoil the image.